Building Sticker 1 – linear motion

This is part 2 of the series. Read part 1 here: https://nadejde.com/2021/01/27/building-sticker-1-planning/

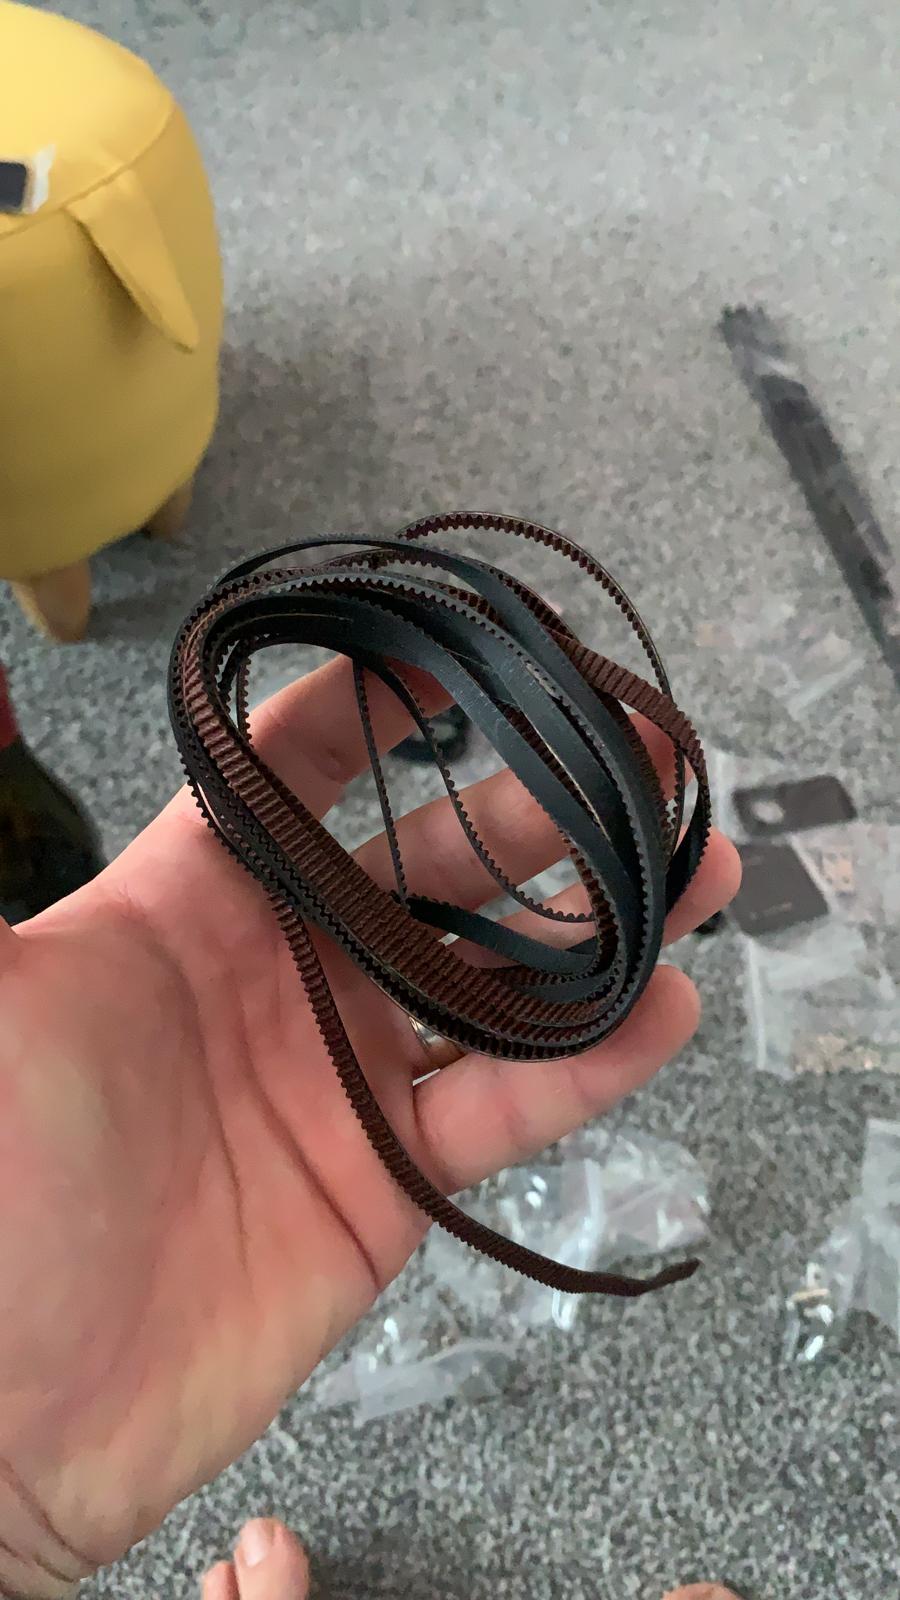
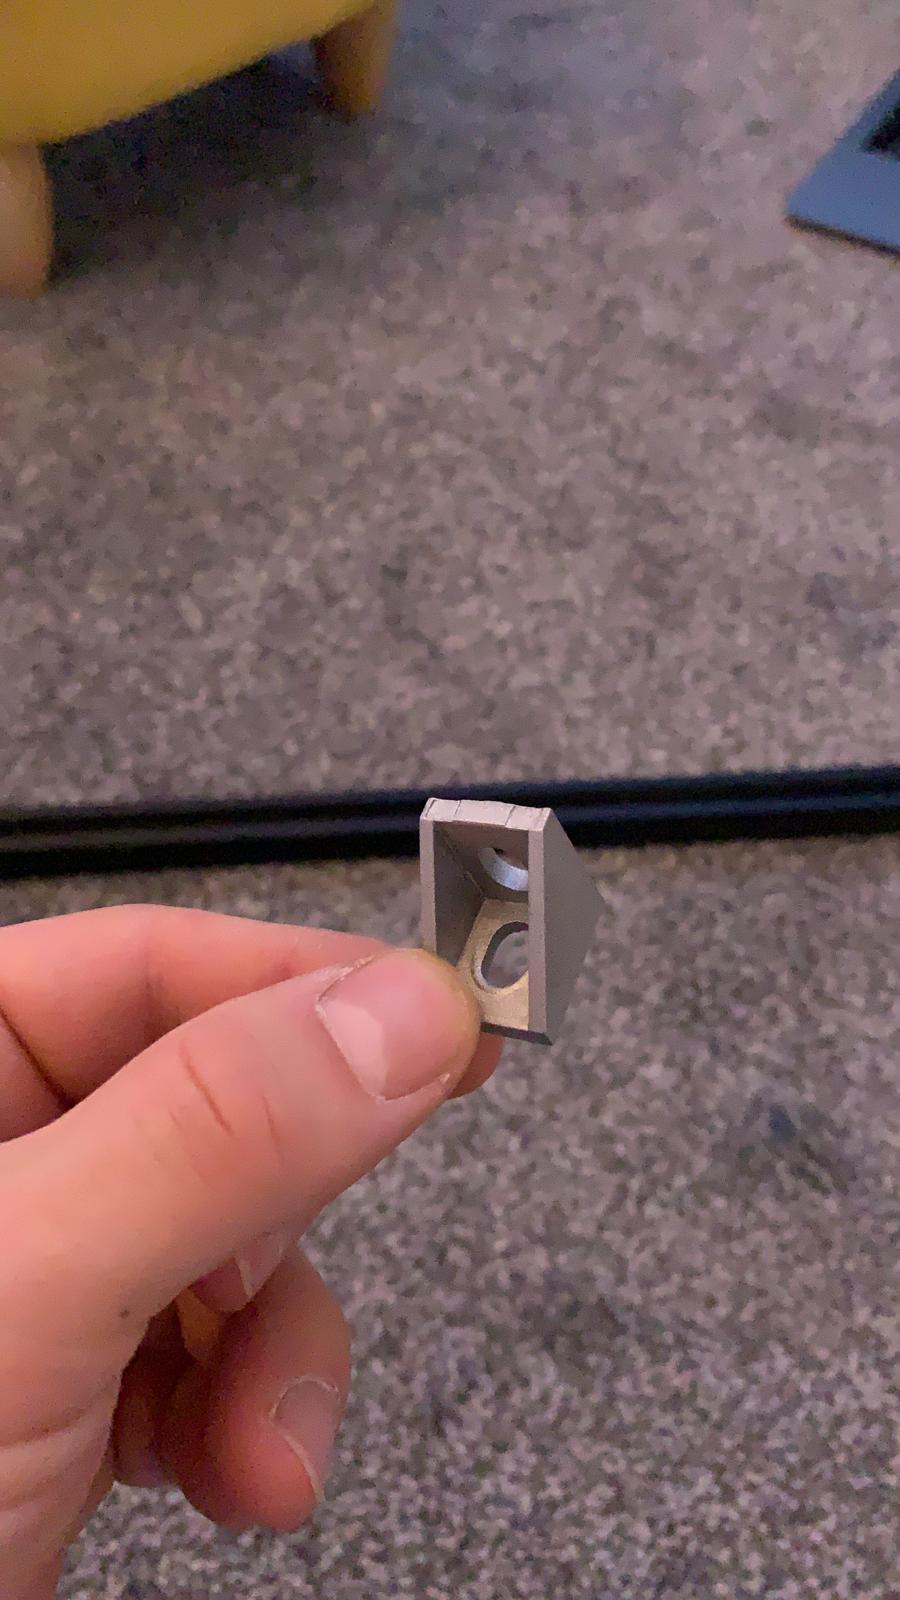
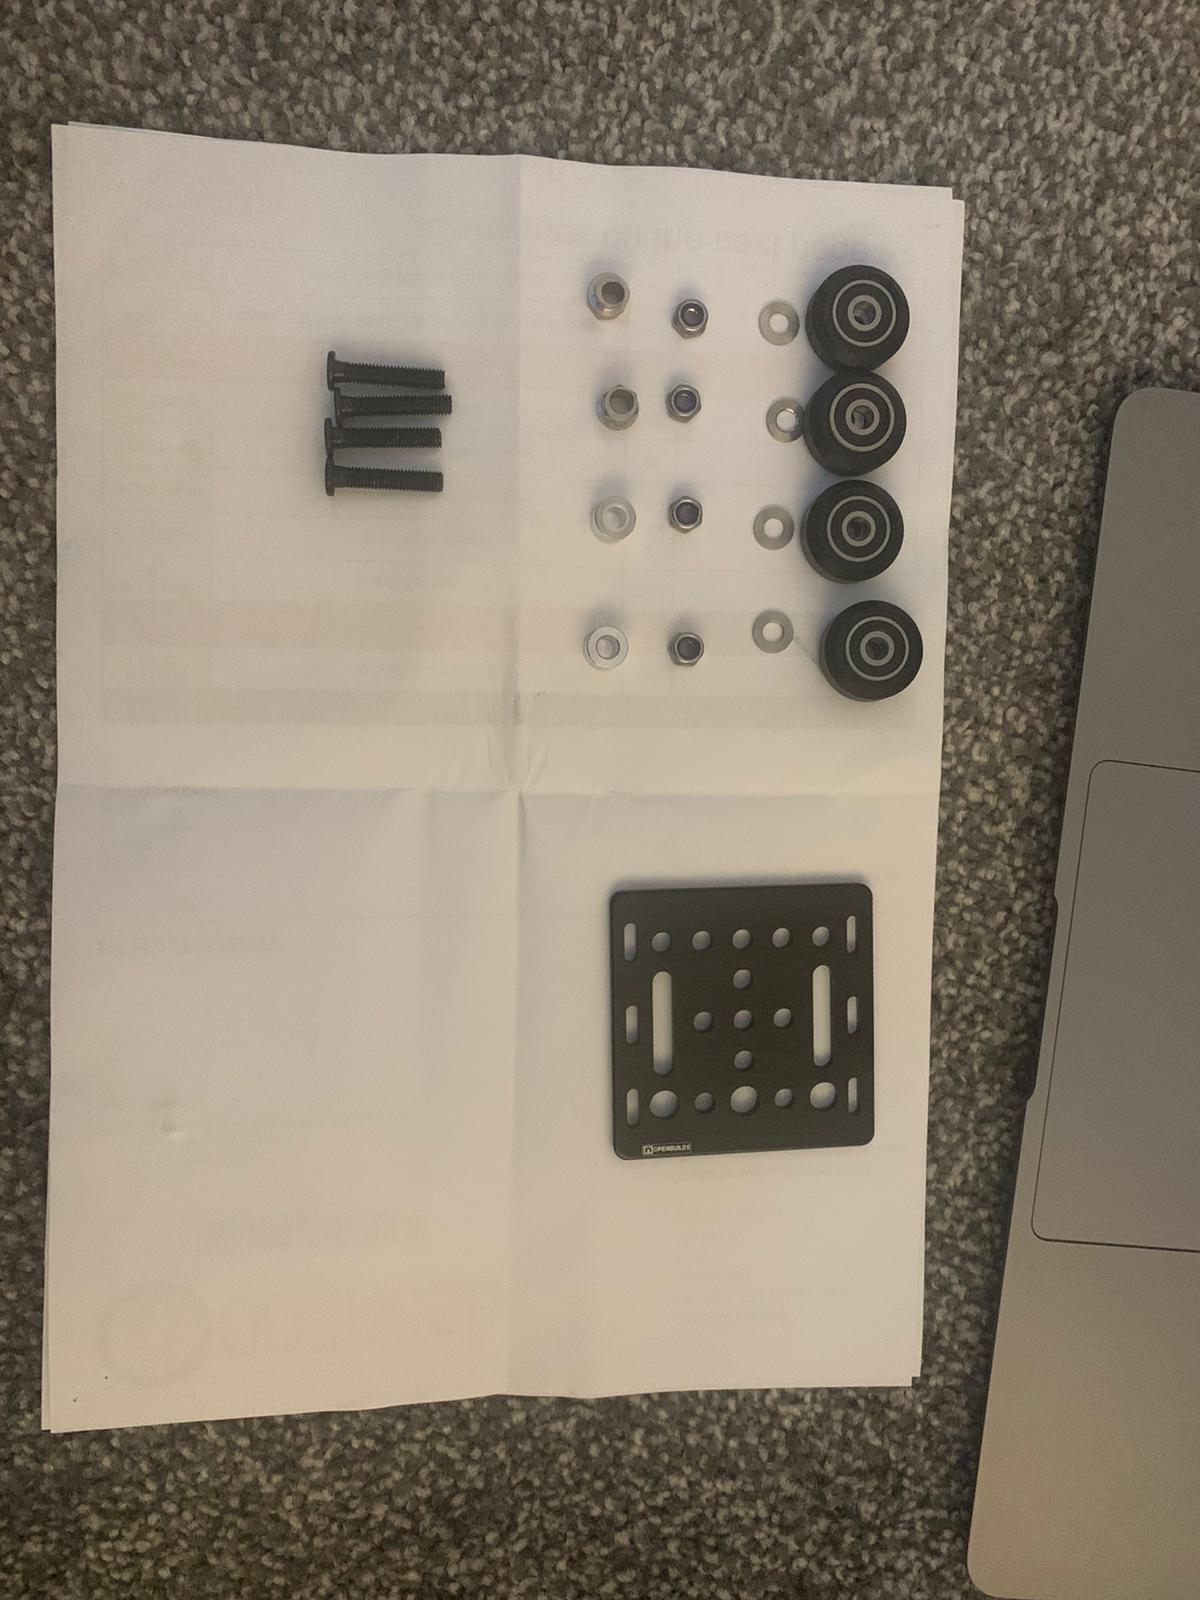
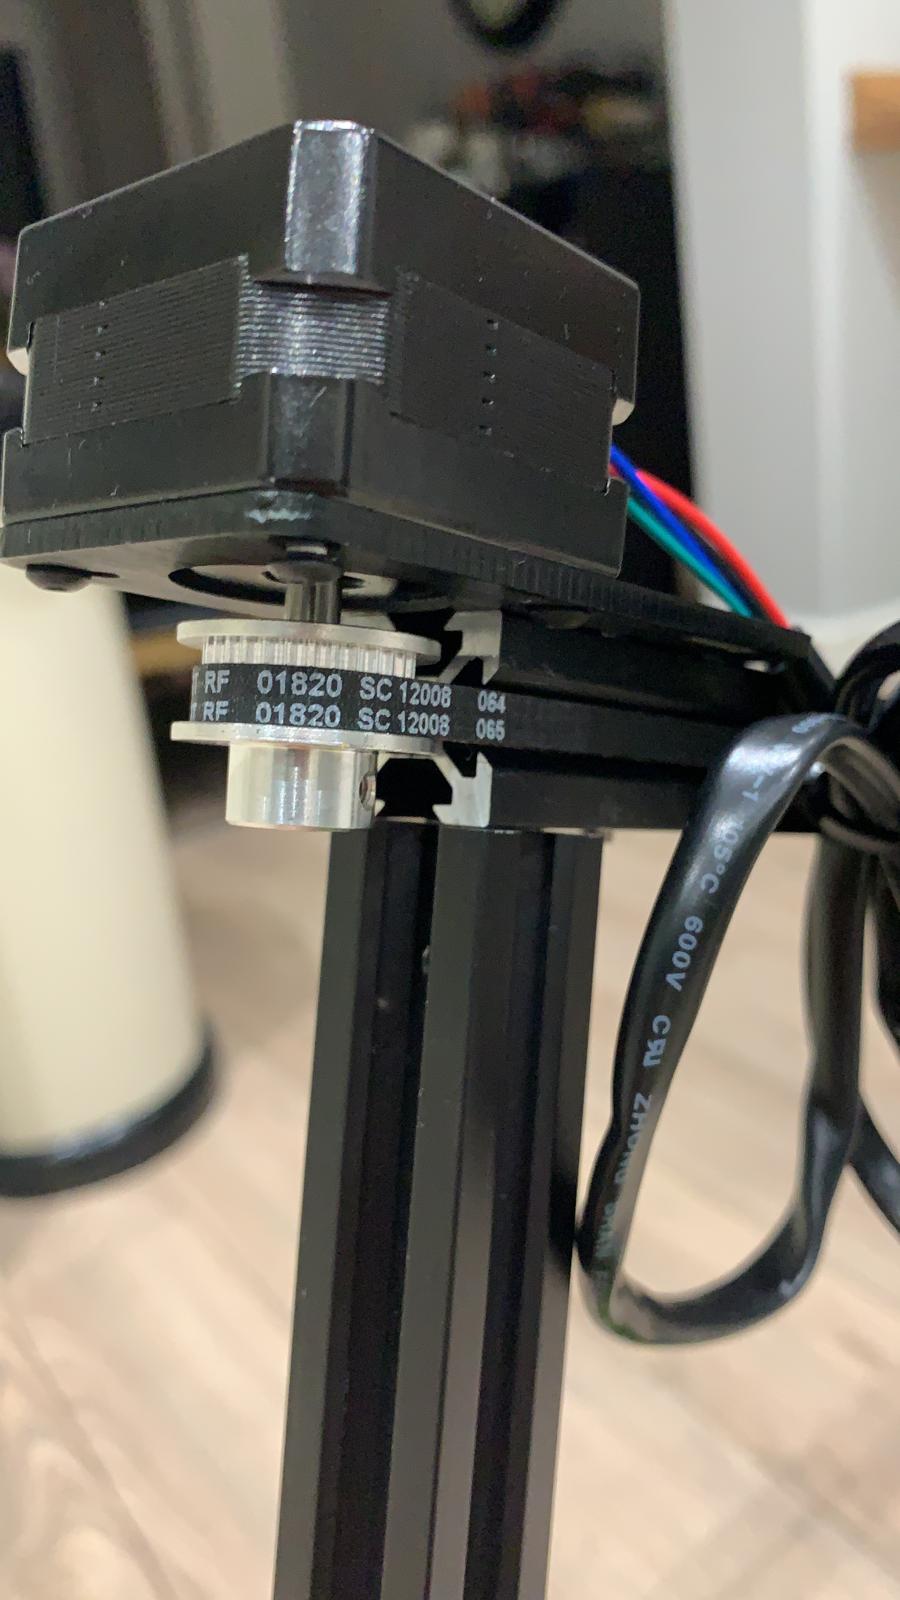
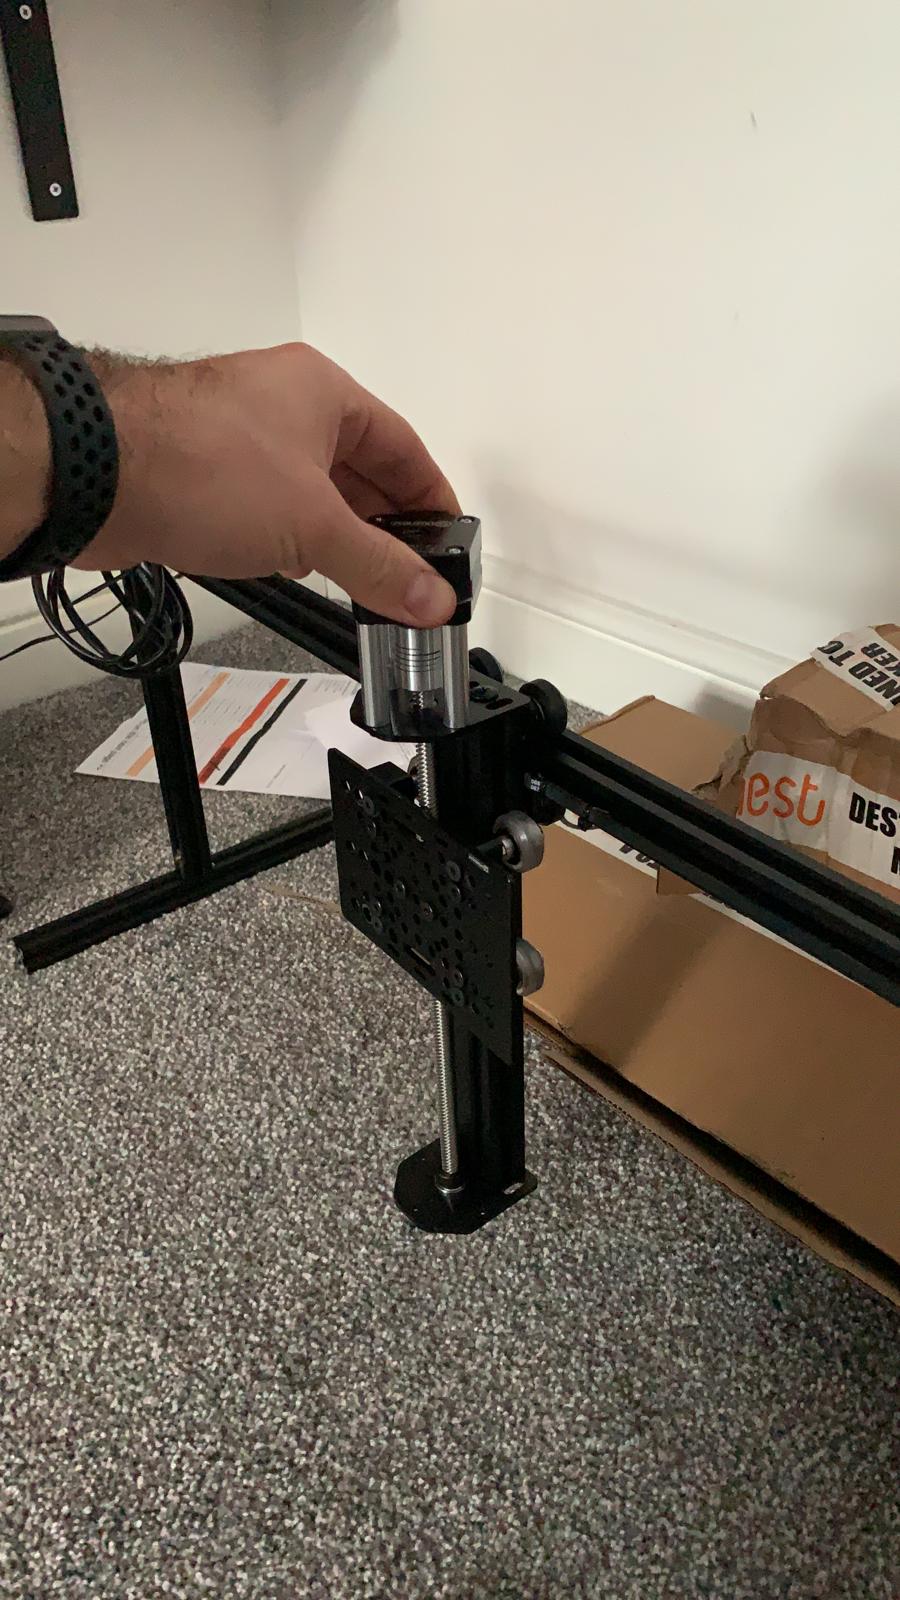
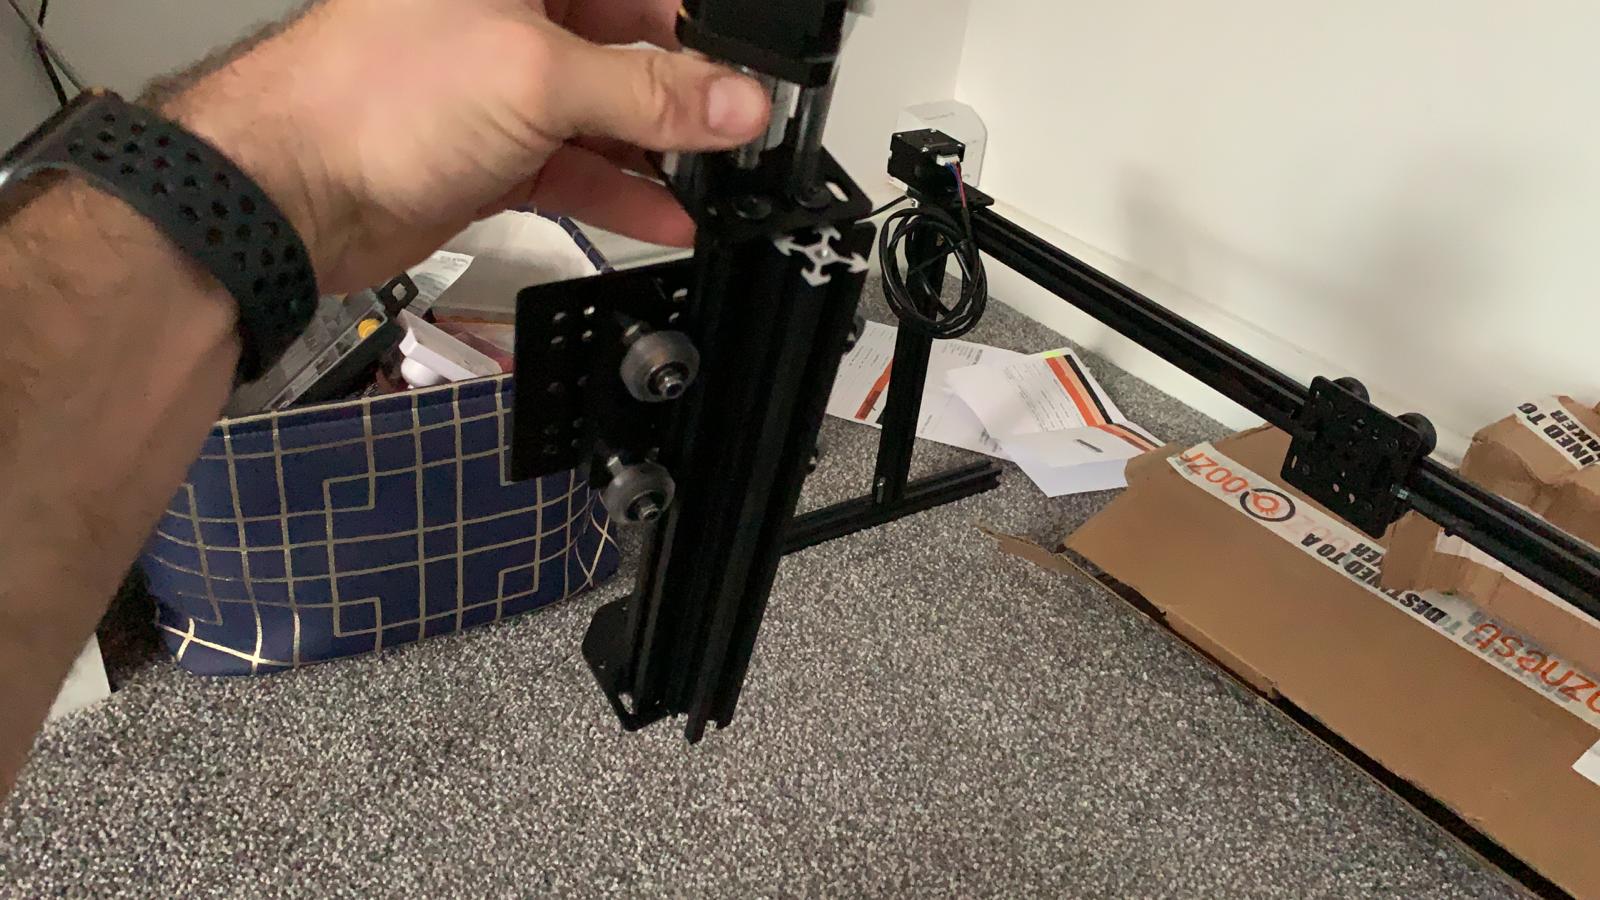
So as I mentioned in the last blog I ended up buying kits following openbuilds specifications from ooznest. This is how they get delivred and some photos my friend Marius took while assembling the kit. Thanks for your help!

Building it together was straightforward by following the guid on youtube (so I’ve been told as I’ve not done it myself:p)

The next piece of the puzzle was controlling the motors to move the carriage left right and up and down. As I’ve mentioned before I decided to use a raspberryPI to control the whole thing. I chose raspberryPI because it is very flexible and in case I drop the project at some point I can still use it for lots of other things. The way you control electronic components with the raspberryPI is through its GPIO ports https://www.raspberrypi.org/documentation/usage/gpio/. It is a very basic way of turning current on or off through a single circuit by writing a simple piece of code. You can even do it in Scratch! for small children to play with:) https://projects.raspberrypi.org/en

# example code for turning LED on through python
# https://gpiozero.readthedocs.io/en/stable/recipes.html#pin-numbering
from gpiozero import LED

led = LED(25) # using GPIO port number 25
led.on() # sends electric current through GPIO port 25
led.off() # stops sending electric current through GPIO port 25

The raspberryPI can’t control the stepper motors on it’s own directly. A normal DC motor you would just give it the required power and it would spin. The stepper motors however need a more complex input that you can provide through a controller chip. Now I had the smallest type of NEMA17 motor:
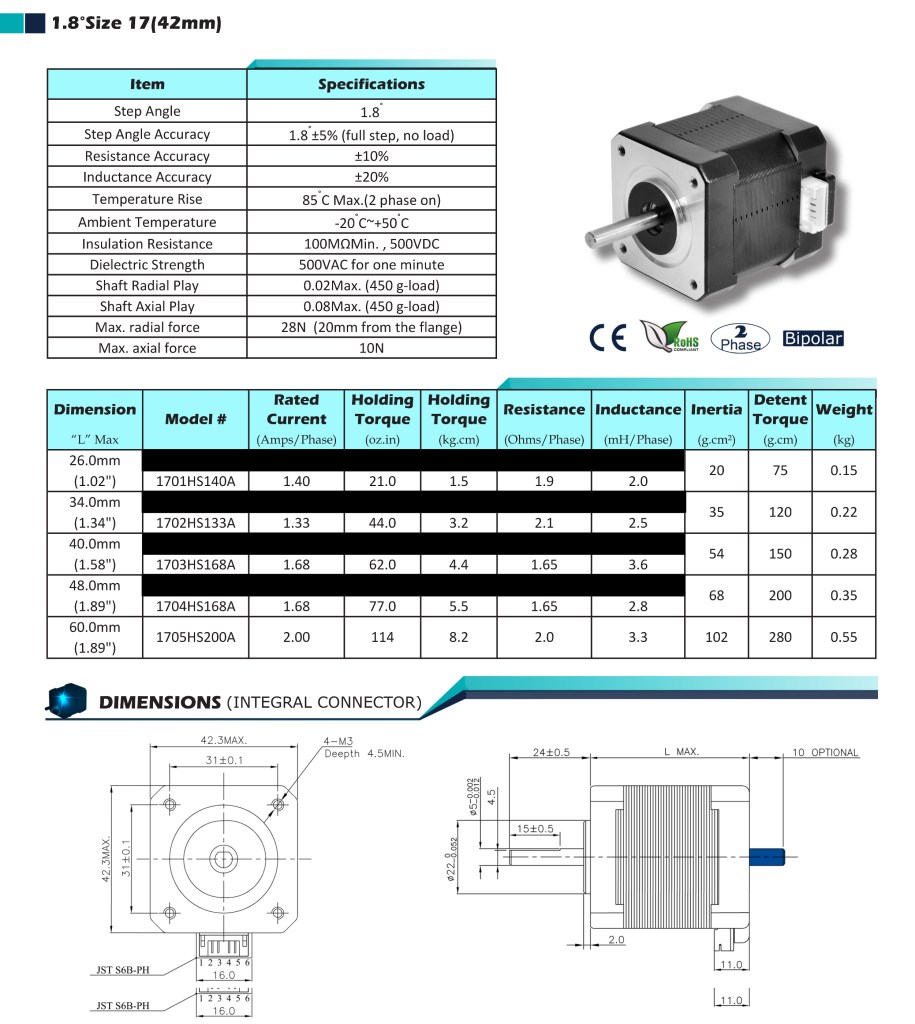
Key things to note are that it works at 12-24V. Also important are the Rated Current values 1.4Amps/Phase and the Internal Resistance of 1.9 Ohms/Phase which will come in later. At this point I was not really aware of how all these things matter. I just look at the 12-24V and 1.4Amps rated current when deciding what controller to use. With Vitaliys help I decided to get a HAT for my rapsberryPI: https://thepihut.com/products/stepper-motor-hat-for-raspberry-pi

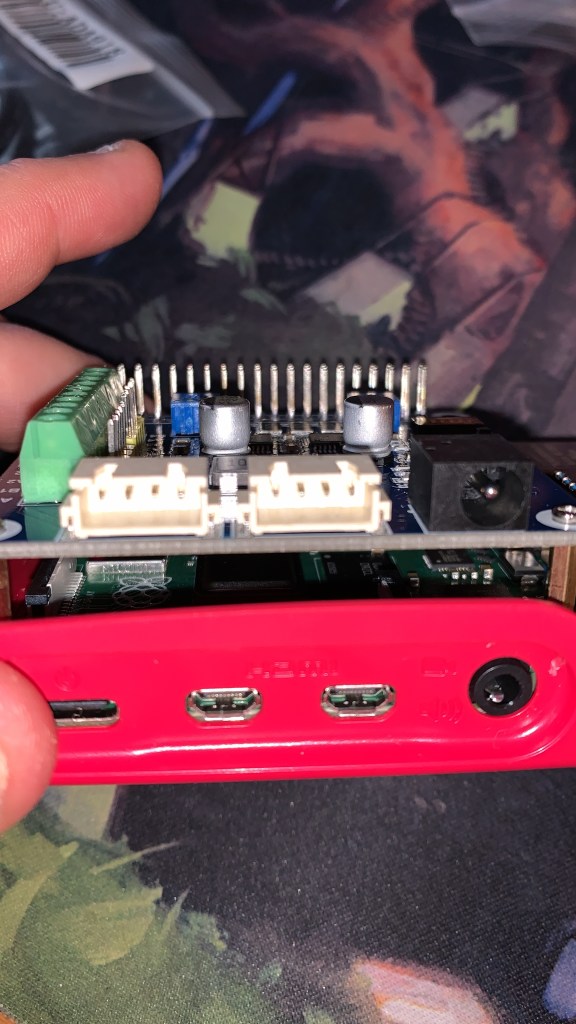
The hat sits on top of the raspberry board and is controlled through the GPIO ports. This one can control motors with up to 24V and can output 2.5Amps so everything looked good on paper. I even managed to control a motor very quickly with it. I didn’t like the code though and the documentation as it was poorly translated from Chinese https://www.waveshare.com/wiki/Stepper_Motor_HAT. I also didn’t like the fact that it uses alot of GPIO ports to control the two motors. In my grandiose plans of controlling tens of robots from the same raspberry PI this would have been a problem:) . This is the example code:

Motor1 = DRV8825(dir_pin=13, step_pin=19, enable_pin=12, mode_pins=(16, 17, 20))
# 6 pins are used up already for 1 motor! 
Motor1.SetMicroStep('softward','fullstep')

Motor1.TurnStep(Dir='forward', steps=200, stepdelay = 0.005)

time.sleep(0.5)

Motor1.TurnStep(Dir='backward', steps=400, stepdelay = 0.005)

Motor1.Stop()

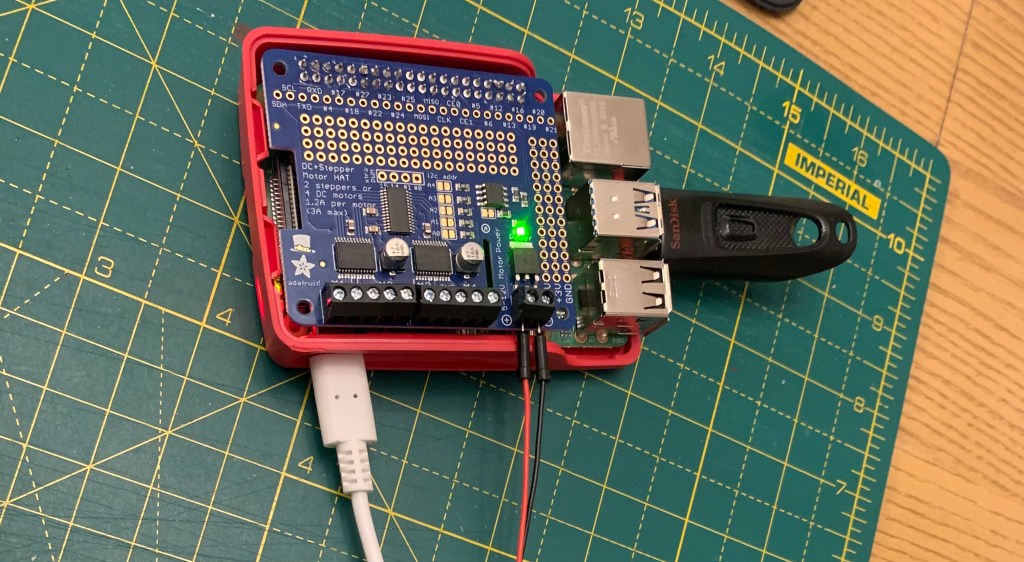
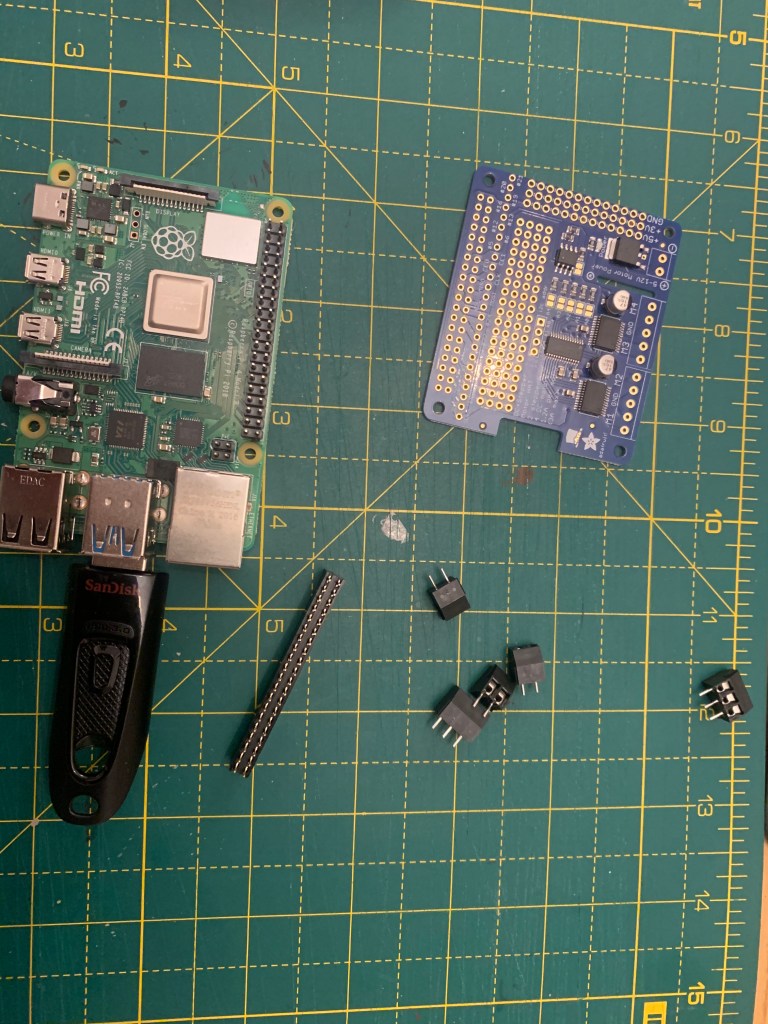
After tinkering with this hat for a while I decided to try a different one also to see if would be easier to work with. I went for the adafruit hat: https://thepihut.com/products/adafruit-dc-stepper-motor-hat-for-raspberry-pi-mini-kit. On paper this again sounded quite good for what I needed. It can do 12V at 1.2Amps with a peak of 3Amps. With my understanding of electronics that sounded like it could to the trick fine. It also involved some light soldering which I was happy to do!

This HAT also has the advantage that it only uses two ports on the raspberry and you can have multiple HATs stacked one on top of the other and use them together. I2C standard: https://learn.adafruit.com/adafruits-raspberry-pi-lesson-4-gpio-setup/configuring-i2c. In my grand plans this was good:)

from adafruit_motorkit import MotorKit
from adafruit_motor import stepper

kit = MotorKit(i2c=board.I2C())
for i in range(0,100): # move a 100 steps
  kit.stepper1.onestep(direction=stepper.BACKWARD, style=stepper.DOUBLE)
kit.stepper1.release()

After plugging everything together and writing the simple code I tried to plug in the motor and let it drive it but it wasn’t doing anything and there were lights blinking on the board. I ended up asking on the adafruit forums and someone kindly explained to me how Ohms law applies and why the adafruit board was not good for the motors I needed to drive: https://forums.adafruit.com/viewtopic.php?f=8&t=173540&p=846120#p846120. Ohm’s Law: I = V/R. So the peak current draw will be 12v / 1.9 Ohms = 6.31A. In other words, these motors are not compatible with the HAT. But wait! the technical specification said 1.4!!! A bit more learning and as it turns out it would eventually go down to 1.4Amps once the internal fields stabilise but as it powers up it will probably try to draw 6.4A at peak if you don’t limit the current somehow. Luckily the Waveshare hat can do that! It has the current chopper and you can actually set it to not go above a certain value so it turns out the initial board was the better one for the job:)

I went back to that board and reconnected all the motors and also used a multimeter to test the Amps used during normal motor movement. It works great on the waveshare hat and you can see it really does use 1.4Amps under normal operation:

Hazaaa!! So now we can move the motors! Next step is to try and move it to the correct place. In order to do that we need to translate steps into distance. I found this little video that explains things in theory: https://youtu.be/6vY26CIrVwg. That didn’t work for me exactly like expected but the steps are the same. One of my motors does a full rotation in 200 steps. Because of the pulley used is 30 tooth 2mm gap one full rotation is in theory 60mm / 6cm. However in reality it turns out depending on how you send the commands to the motor and the various errors you won’t get this ideal distance. I struggle with this a bit as I was expecting the error to be bigger on longer distances and smaller on shorted distances. I did some tests:

    @0.0007 step delay
    2666 steps = 810 mm = 3.2915 steps/mm
    2500 steps = 760 mm = 3.2894 steps/mm
    2000 steps = 615 mm = 3.2520 steps/mm
    1500 steps = 462 mm = 3.2467 steps/mm
    1000 steps = 315 mm = 3.1746 steps/mm
    500 steps = 160 mm = 3.1250 steps/mm
    200 steps = 70 mm = 2.8570 steps/mm
    100 steps = 39 mm = 2.5641 steps/mm

    @0.0005 step delay
    2666 steps = 817 mm = 3.2631 steps/mm
    2500 steps = 767 mm = 3.2594 steps/mm
    2000 steps = 617 mm = 3.2414 steps/mm
    1500 steps = 470 mm = 3.1914 steps/mm
    1000 steps = 320 mm = 3.1250 steps/mm
    500 steps = 166 mm = 3.0120 steps/mm
    200 steps = 80 mm = 2.5000 steps/mm
    100 steps = 46 mm = 2.1700 steps/mm

    theoretical 
    200 steps = 60 mm = 3.3333 steps/mm

After the tests I realised a few things:

  1. Using different step delays yields different errors. Step delay is the pause you have between two step commands. The way you control the stepper is step by step and there needs to be a break between each command. It seems that with shorter delays the errors are larger and the motor overshoots. From the theoretical values for example at 2666 I was expecting 800mm movement. At 0.0005 step delay I was overshooting by 17 mm. At 0.0007 step delay I was overshooting only 10mm.
  2. The distance it overshoots seems to be more or lest constant for longer distances and is at 17mm when using the 0.0005 step delay. This means its easy to correct this by just removing a fixed number of steps from each move command.
  3. On very short distances it overshoots by more than on long distances. This is more prominent when using the 0.0005 step delay (the short one). This is why I ended up using a longer step delay for moving shorter distances and the shorter one for longer distances.
  4. The movement is not 100% precise. If I do the same number of steps 10 times its not going to always stop in the same place. This is actually a bit disappointing as one of the selling points of stepper motors is that they are very precise!
  5. I had to add physical stopper at both ends to correct the errors that accumulate over time. Every time I move it to one end or the other I overshoot it a little bit but the stopper forces it to be on the exact starting/ending position.

I’m still not really sure where the problem is causing these errors. I would not expect the step delay to cause this much of a difference. It might be that the controller board is not able to output enough current at the start or perhaps even the board is not the best:) For now I got it into a place where I can reliably move it to where I want most of the time so I am happy. You can see it at work again here:

For now all of this works as I’m just building a prototype but at some point I will want to go back and try a rebuild with a better controller and bigger motors. I’m looking at this bad boy which can power 4 motors at the same time: https://thepihut.com/products/tinyg-cnc-controller-board-v8

Stay tuned for my next post on the sensors and card grabbing mechanism!
Building Sticker 1 – Planning

In part 1 I’ll go through a bit of the why, planning and inspiration.

I started some collections a year back and as I had a lot of extra cards I started selling the extra ones I had on ebay. One thing led to another and I’m now buried in trading cards and stickers from various collections but mostly football. The ebay shop grew also as I started selling extras from all the collections and after a while I just started buying good offers just for the shop. One of the first challenges I had was keeping inventory accurate. It was doing that in google sheets at first but quickly moved on building my own tool for that so I can quickly upload new stickers and cards by taking photos of them and removing numbers from inventory after orders by just putting a list of numbers in (tool will probably be a different blog post).

Once I had the basic inventory out of the way I started looking at how to solve the other big problem I had: sorting the cards I bought and merging with the existing inventory is manual work that I enjoy doing but it was taking more and more of my free time. Building orders is also a manual job, and especially for big orders it can take evening time away from my gaming time :P.

I started researching for a ready made solution for sorting cards, either existing guides or just to buy a pre made robot. I did find some things but they were either not really suitable for what I needed or very expensive or both. Some of the things I found:

So with that in mind I started thinking how my robot would look like and work. With that in mind I drew a little cad sketch of what I think this could be while researching a bit around linear motion and controlling mention. It also helped I had a couple of friends to exchange ideas with and they were able to pitch in and contour my thoughts. Thanks Vitaliy and Marius!

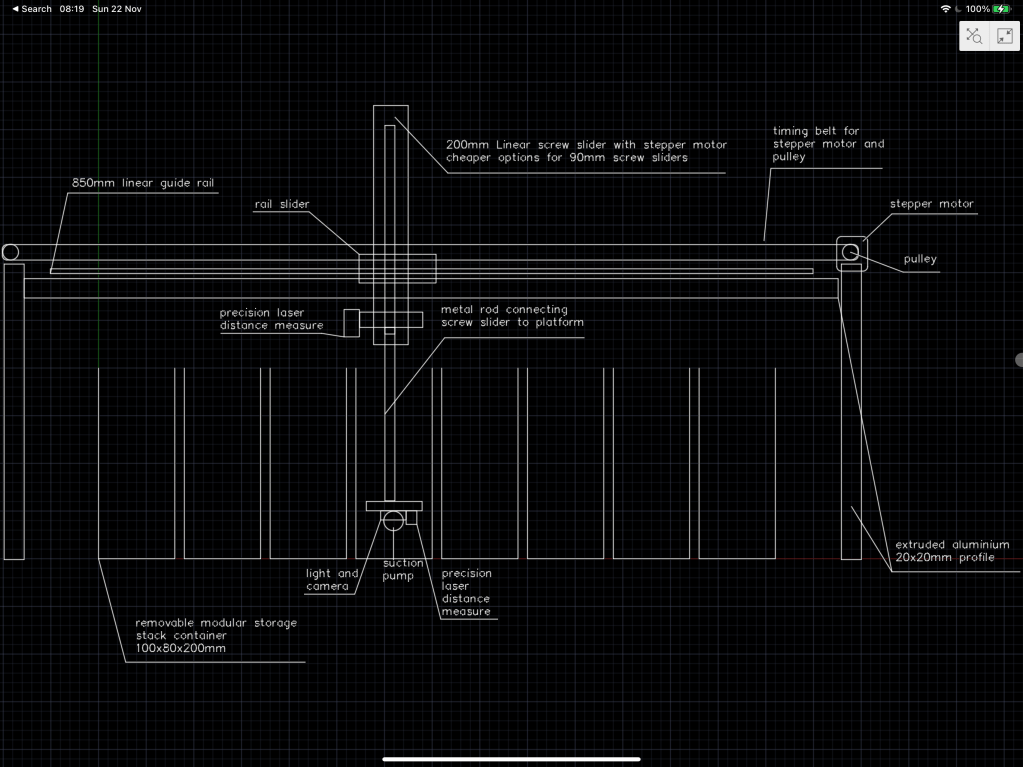
This is my initial sketch:

The sketch is a simplification of the magic sorter machine. It only moves on the X axis while the magic sorter has X and Y axis movement. The main idea is to move a crane from left to right on the X axis. Get to the right pile of cards. Move the crane down on the Z axis. Pick up the card and move it to another position.

The main components identified are:

  • A sturdy frame to support things -> After some investigation this turns out to be extruded aluminium. Very easy to use and buy and quite common in CNC machines.
  • A way to move the carriage platform on the X axis (left to right and back). This again turned up to be a common thing in CNC machines called a linear belt driven actuator
  • A way to move the carriage platform on the Z axis (up and down). This turned out to be a lead screw linear actuator. CNC! Again:)
  • A way to manipulate and detect cards on the platform. This will be a combination of sensors, suction cups and camera.

What I discovered while planing this robot and learning about the technologies (as I know nothing when going in) is that what I was actually building was a CNC machine ( computer numerical control machine ). It is a very common machine and there are loads of patterns and information and even prebuilt parts out there. Common CNC machines are: 3d printer, engraving machines, plotters etc. After I discovered this things became a bit easier:)

I discovered this website: https://openbuilds.com which is amazing! It will have guides, blueprints, parts lists to build most of the things you can think of. I ended up using two of their blueprints when building the X and Z axis motion. I ended up ordering everything I needed for the frame and linear motions from this site: https://ooznest.co.uk/. They basically use openbuilds blueprints and let you customise for your needs and send all the parts out to you by post including the motors. You only have to assemble it. They even add links to the youtube video tutorial on assembling the kits!

This made things very easy for me. Initially I was trying to figure out all the parts and how they work together on their own but openbuilds saved my project. But if you don’t have access to ooznest directly you can always just get the parts-list from openbuilds and order the components you need form whatever suppliers delivers to you: https://openbuilds.com/builds/v-slot®-nema-17-linear-actuator-belt-driven.80/

The only thing I ended up not buying as part of the kits was the controller boards. I chose not to buy them because they don’t seem to be directly compatible with the raspberry PI. And by this point I decided to use a raspberry PI for all the logic and controlling of the robot itself. More on that in the next post!

Here is a teaser of the robot in action:

Part two is now ready to read here: https://nadejde.com/2021/02/03/building-sticker-1-linear-motion/

ASP.NET 5 beta8, CI and Azure

This is the fourth post in a series about building Wedding Planner Tools Web App with ASP.NET 5, MVC 6 and Entity Framework 7. The previous post was about updating the project to use beta8 and the coreCLR runtime. This is the first post of the series.

I then tried to deploy to azure and see what happens (by pushing to VSO and letting the CI do it’s magic) and I got this error: The project being published does not support the run time ‘dnx-clr-win-x86.1.0.0-beta8’. This is apparently a known issue https://github.com/aspnet/Tooling/blob/master/known-issues.md. The workaround is to specifically set the target DNX version in the settings tab of the publish dialog. This helps with the problem when you publish from Visual Studio.

I then added the specific runtime and architecture int prebuild.ps1 file for dnvm install to ensure the correct sdk gets installed on the build agent vm. I wanted to remove the Visual Studio build step and replace it with executing dnu build as a command line step. The step was failing because of missing dnx. I then added -g to dnvm install to install it globally. https://github.com/aspnet/dnx/issues/2239 but this didn’t work either. It seems that changes to the path just aren’t carried over to the next execution step (this is weird but I don’t have the time to understand why it is so). So then I ran into this post and tried building and deploying via power shell script only in one step. I added the build and publish commands to Prebuild.ps1. http://www.brandonmartinez.com/2015/09/16/deploying-asp-net-5-beta-7-through-vso/. Power shell arguments for build step ended up looking like this:

-vsoProjectName "WeddingPlannerTools" -projectName "WeddingPlannerTools" -BuildConfiguration $(BuildConfiguration) -buildSourcesDirectory $(Build.SourcesDirectory)

Prebuild.ps1

param([string]$projectName="", [string]$BuildConfiguration="", [string]$vsoProjectName="", [string]$buildSourcesDirectory="")
# bootstrap DNVM into this session.
# load up the global.json so we can find the DNX version
$globalJson = Get-Content -Path $PSScriptRoot\global.json -Raw -ErrorAction Ignore | ConvertFrom-Json -ErrorAction Ignore

if($globalJson)
{
    $dnxVersion = $globalJson.sdk.version
	$dnxRuntime = $globalJson.sdk.runtime
	$dnxArchitecture = $globalJson.sdk.architecture
}
else
{
    Write-Warning "Unable to locate global.json to determine using 'latest'"
    $dnxVersion = "latest"
	$dnxRuntime = "coreclr"
	$dnxArchitecture ="x86"
}

$env:DNX_HOME="$ENV:USERPROFILE\.dnx"
$env:DNX_GLOBAL_HOME="$ENV:USERPROFILE\.dnx"

# install DNX
# only installs the default (x86, clr) runtime of the framework.
# If you need additional architectures or runtimes you should add additional calls
# ex: & $env:USERPROFILE\.dnx\bin\dnvm install $dnxVersion -r coreclr
& $env:USERPROFILE\.dnx\bin\dnvm install $dnxVersion -a $dnxArchitecture -r $dnxRuntime -Persistent

 # run DNU restore on all project.json files in the src folder including 2>1 to redirect stderr to stdout for badly behaved tools
Get-ChildItem -Path $PSScriptRoot\src -Filter project.json -Recurse | ForEach-Object { & dnu restore $_.FullName 2>1 }

& "dnu" "build" "$PSScriptRoot\src\$projectName" "--configuration" "$BuildConfiguration"
 
& "dnu" "publish" "$PSScriptRoot\src\$projectName" "--configuration" "$BuildConfiguration" "--out" "$buildSourcesDirectory\$vsoProjectName\artifacts\bin\$BuildConfiguration\Publish" "--runtime" "active"

Dnu publish is logging npm warnings as errors for some reason so I’ve set continue on error for this step for now. I just want to see it published!

npm WARN package.json ASP.NET@0.0.0 No description
npm WARN package.json ASP.NET@0.0.0 No repository field.
npm WARN package.json ASP.NET@0.0.0 No README data
npm WARN package.json ASP.NET@0.0.0 No license field.

This is how the build steps look on VSO:
Build steps

Finally follow this guide to make the up run on azure: https://github.com/aspnet/Hosting/issues/364#issuecomment-148567294, http://www.elanderson.net/2015/10/migration-from-asp-net-5-beta-7-to-beta-8/. With this changes you should be able o run the app in IISExpress also but for me it does not seem to work (HTTP Error 500.19 – Internal Server Error but I don’t have the energy to fight it:) ). It does however work in Azure! Success!
Success

links

ASP.NET 5 project content and beta8

This is the third post in a series about building Wedding Planner Tools Web App with ASP.NET 5, MVC 6 and Entity Framework 7. The previous post was about deploying the web app to Azure and CI. This is the first post of the series.

I decided to go through the project files and make some changes. The root solution folder has a file called global.json. This file sets the source code folders and the sdk to use. I went in here to change the sdk version to beta8 which is the latest version at the time of writing. I also want to change the runtime to CoreCLR -which is the new open source, cross-platform runtime- and architecture to x86. Visual Studio will ask you to download the new sdk when you save the file. If Visual Studio does not ask you to do that you can run:

dnvm install 1.0.0-beta8 -a x86 -r coreclr -OS win
dnvm list #to check installed runtimes

global.json

{
  "projects": [ "src", "test" ],
  "sdk": { 
    "version": "1.0.0-beta8", //changed this to beta8
    "runtime": "coreclr", //and this to coreclr
    "architecture": "x86"
  }
}

I’ve updated all the dependencies to beta8 also. Microsoft.AspNet.Server.IIS is no longer supported after beta7. I’ve added Microsoft.AspNet.Server.Kestrel https://github.com/aspnet/KestrelHttpServer instead of Microsoft.AspNet.Server.WebListener and Microsoft.AspNet.IISPlatformHandler http://wildermuth.com/2015/10/20/Upgrading_from_ASP_NET_5_Beta_7_to_Beta_8 instead of Microsoft.AspNet.Server.IIS. You need to do dnu restore after changing versions. I’ve also removed dnx451 from the frameworks list as I don’t want to support the old framework.

project.json

{
  "webroot": "wwwroot",
  "userSecretsId": "removed",
  "version": "1.0.0-*",

  "dependencies": {
    "EntityFramework.SqlServer": "7.0.0-beta8",
    "EntityFramework.Commands": "7.0.0-beta8",
    "Microsoft.AspNet.Mvc": "6.0.0-beta8",
    "Microsoft.AspNet.Mvc.TagHelpers": "6.0.0-beta8",
    "Microsoft.AspNet.Authentication.Cookies": "1.0.0-beta8",
    "Microsoft.AspNet.Authentication.Facebook": "1.0.0-beta8",
    "Microsoft.AspNet.Authentication.Google": "1.0.0-beta8",
    "Microsoft.AspNet.Authentication.MicrosoftAccount": "1.0.0-beta8",
    "Microsoft.AspNet.Authentication.Twitter": "1.0.0-beta8",
    "Microsoft.AspNet.Diagnostics": "1.0.0-beta8",
    "Microsoft.AspNet.Diagnostics.Entity": "7.0.0-beta8",
    "Microsoft.AspNet.Identity.EntityFramework": "3.0.0-beta8",
    "Microsoft.AspNet.Server.Kestrel": "1.0.0-beta8", //new web server instead of WebListener
    "Microsoft.AspNet.IISPlatformHandler": "1.0.0-beta8", //instead of Microsoft.AspNet.Server.IIS
    "Microsoft.AspNet.StaticFiles": "1.0.0-beta8",
    "Microsoft.AspNet.Tooling.Razor": "1.0.0-beta8",
    "Microsoft.Framework.Configuration.Abstractions": "1.0.0-beta8",
    "Microsoft.Framework.Configuration.Json": "1.0.0-beta8",
    "Microsoft.Framework.Configuration.UserSecrets": "1.0.0-beta8",
    "Microsoft.Framework.Logging": "1.0.0-beta8",
    "Microsoft.Framework.Logging.Console": "1.0.0-beta8",
    "Microsoft.VisualStudio.Web.BrowserLink.Loader": "14.0.0-beta8"
  },

  "commands": {
    "web": "Microsoft.AspNet.Server.Kestrel", //this also changes to fire up Kestrel instead of WebListener
    "ef": "EntityFramework.Commands"
  },

  "frameworks": { //only using .net core
    "dnxcore50": { }
  },

  "exclude": [
    "wwwroot",
    "node_modules",
    "bower_components"
  ],
  "publishExclude": [
    "node_modules",
    "bower_components",
    "**.xproj",
    "**.user",
    "**.vspscc"
  ],
  "scripts": {
    "prepublish": [ "npm install", "bower install", "gulp clean", "gulp min" ]
  }
}

Doing this will break your project into a million places as it seems they’ve changed some core stuff from beta5 to 8 without backwards compatibility. Hey it’s in beta! And to be fair it’s only in 37 places. Let’s have a look at the problems I needed to fix. You can ignore any errors in the Migrations folder and just delete for now. I had to rebuild the migrations files as they were no longer matching the identity context in beta8 (see below). http://www.elanderson.net/2015/10/migration-from-asp-net-5-beta-7-to-beta-8/

  • Microsoft.Data.Entity.Relational.Migrations namespace is gone. Use Microsoft.Data.Entity.Migrations instead.
  • Microsoft.Data.Entity.Relational.Migrations.Builders is gone. It’s Microsoft.Data.Entity.Migrations.Operations.Builders now.

In account controller

  • _signInManager.SignOut() changes to _signInManager.SignOutAsync()
  • replace context.Database.AsRelational().ApplyMigrations(); with context.Database.Migrate();
  • replace Context.User.GetUserId() with HttpContext.User.GetUserId()

In manage controller

  • replaced Context.User with HttpContext.User

In startup.cs

  • replace FacebookAuthenticationOptions with FacebookOptions
  • replace MicrosoftAccountAuthenticationOptions with MicrosoftAccountOptions
  • replace app.UseErrorPage(ErrorPageOptions.ShowAll); with app.UseDeveloperExceptionPage();
  • replace app.UseErrorHandler(“/Home/Error”); with app.UseExceptionHandler(“/Home/Error”);
  • replace Microsoft.Framework.Runtime with Microsoft.Dnx.Runtime;
  • replace ConfigurationBuilder(appEnv.ApplicationBasePath) with ConfigurationBuilder().SetBasePath(appEnv.ApplicationBasePath)

And after all that effort I deleted the existing database on my dev machine then hit F5. I lunched it using the web command not IISExpress. I tried to register a user and got a nasty database error.

error : [Microsoft.AspNet.Diagnostics.ExceptionHandlerMiddleware] An unhandled exception has occurred: Value cannot be null.
Parameter name: key
System.ArgumentNullException: Value cannot be null.
Parameter name: key
at System.Collections.Generic.Dictionary`2.Insert(TKey key, TValue value, Boolean add)
at System.Linq.Enumerable.ToDictionary[TSource,TKey,TElement](IEnumerable`1 source, Func`2 keySelector, Func`2 elementSelector, IEqualityComparer`1 comparer)
at Microsoft.Data.Entity.Migrations.Internal.MigrationsAssembly.c__DisplayClass3_0.b__0()
at Microsoft.Data.Entity.Internal.LazyRef`1.get_Value()
at Microsoft.Data.Entity.Migrations.Internal.MigrationsAssembly.get_Migrations()
at Microsoft.Data.Entity.Migrations.Internal.Migrator.d__13.MoveNext()
at Microsoft.Data.Entity.Migrations.Internal.Migrator.Migrate(String targetMigration)
at Microsoft.Data.Entity.RelationalDatabaseFacadeExtensions.Migrate(DatabaseFacade databaseFacade)
at WeddingPlannerTools.Controllers.AccountController.EnsureDatabaseCreated(ApplicationDbContext context) in C:\Work\Wedding Planner Tools\WeddingPlannerTools\src\WeddingPlannerTools\Controllers\AccountController.cs:line 448
at WeddingPlannerTools.Controllers.AccountController.d__10.MoveNext() in C:\Work\Wedding Planner Tools\WeddingPlannerTools\src\WeddingPlannerTools\Controllers\AccountController.cs:line 106
--- End of stack trace from previous location where exception was thrown ---
...rest removed for brevity...

Looking in the database I can see the database created but there’s not tables in it and no migrations have ran. I get this error while trying to update the database manually running the migration:

C:\Work\Wedding Planner Tools\WeddingPlannerTools\src\WeddingPlannerTools>dnx ef database update
Using context 'ApplicationDbContext'.
Using database 'removed' on server '(localdb)\mssqllocaldb'.
System.ArgumentNullException: Value cannot be null.
Parameter name: key
at System.Collections.Generic.Dictionary`2.Insert(TKey key, TValue value, Boolean add)
at System.Linq.Enumerable.ToDictionary[TSource,TKey,TElement](IEnumerable`1 source, Func`2 keySelector, Func`2 elementSelector, IEqualityComparer`1 comparer)
at Microsoft.Data.Entity.Migrations.Internal.MigrationsAssembly.c__DisplayClass3_0.b__0()
at Microsoft.Data.Entity.Internal.LazyRef`1.get_Value()
at Microsoft.Data.Entity.Migrations.Internal.MigrationsAssembly.get_Migrations()
at Microsoft.Data.Entity.Migrations.Internal.Migrator.d__13.MoveNext()
at Microsoft.Data.Entity.Migrations.Internal.Migrator.Migrate(String targetMigration)
at Microsoft.Data.Entity.Design.MigrationsOperations.UpdateDatabase(String targetMigration, String contextType)
at Microsoft.Data.Entity.Commands.Program.UpdateDatabase(String migration, String context)
at Microsoft.Data.Entity.Commands.Program.c__DisplayClass7_2.b__5()
at Microsoft.Dnx.Runtime.Common.CommandLine.CommandLineUtilsExtensions.c__DisplayClass0_0.b__0()
at Microsoft.Dnx.Runtime.Common.CommandLine.CommandLineApplication.Execute(String[] args)
at Microsoft.Data.Entity.Commands.Program.Main(String[] args)
Value cannot be null.
Parameter name: key

The migrations generated under beta5 where no longer matching the identity tables in beta8. So I removed the migrations folder and regenerated the initial migrations. http://aspnetmvc.readthedocs.org/projects/mvc/en/latest/tutorials/mvc-with-entity-framework.html. The commands seem to be a bit different in beta8:

dnx ef migrations add Initial
dnx ef database update

I can now see the database tables look as they should and the migration was successfully applied. I can also register and login with a new user in the web app. Hurray! Join us next time for the CI and deploying beta8 to azure adventure:)

links
* ASP.NET 5
* MVC 6
* Entity Framework 7
* previous post
* first post
* CoreCLR
* https://github.com/aspnet/KestrelHttpServer
* http://wildermuth.com/2015/10/20/Upgrading_from_ASP_NET_5_Beta_7_to_Beta_8
* http://www.elanderson.net/2015/10/migration-from-asp-net-5-beta-7-to-beta-8/
* http://aspnetmvc.readthedocs.org/projects/mvc/en/latest/tutorials/mvc-with-entity-framework.html
* http://davidfowl.com/diagnosing-dependency-issues-with-asp-net-5/
* http://www.codeproject.com/Articles/1005145/DNVM-DNX-and-DNU-Understanding-the-ASP-NET-Runtime
* https://github.com/aspnet/EntityFramework/wiki/Design-Meeting-Notes–August-20,-2015#relationship-api-naming
* https://msdn.microsoft.com/en-us/library/bb386947(v=vs.110).aspx

Wedding Planner Tools Web App – deploying to Azure

This is the second post in a series about building an app with ASP.NET 5, MVC 6 and Entity Framework 7. The First Post was about setting up source control and creating the project. This post will discuss publishing to azure and setting up continuous deployment.

Publishing to Azure

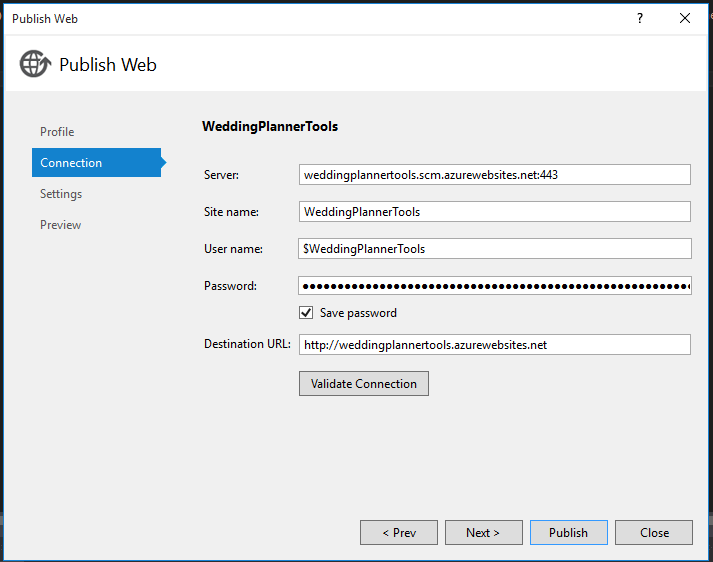
Lets get to it. Right click the project name and select Publish. Go into Profile and choose Microsoft Azure Web Apps. If you choose to use Azure while creating the project you can choose the existing one. Otherwise you need to set-up a new one. The process is the same as when creating a new project (see First Post).

Publish profile

Go by the connection details as these should be already filled in.

Publish web app credentials

Settings can stay as they are. And then Publish.

Publish web app settings

And now it’s running fine in azure.

Running on azure

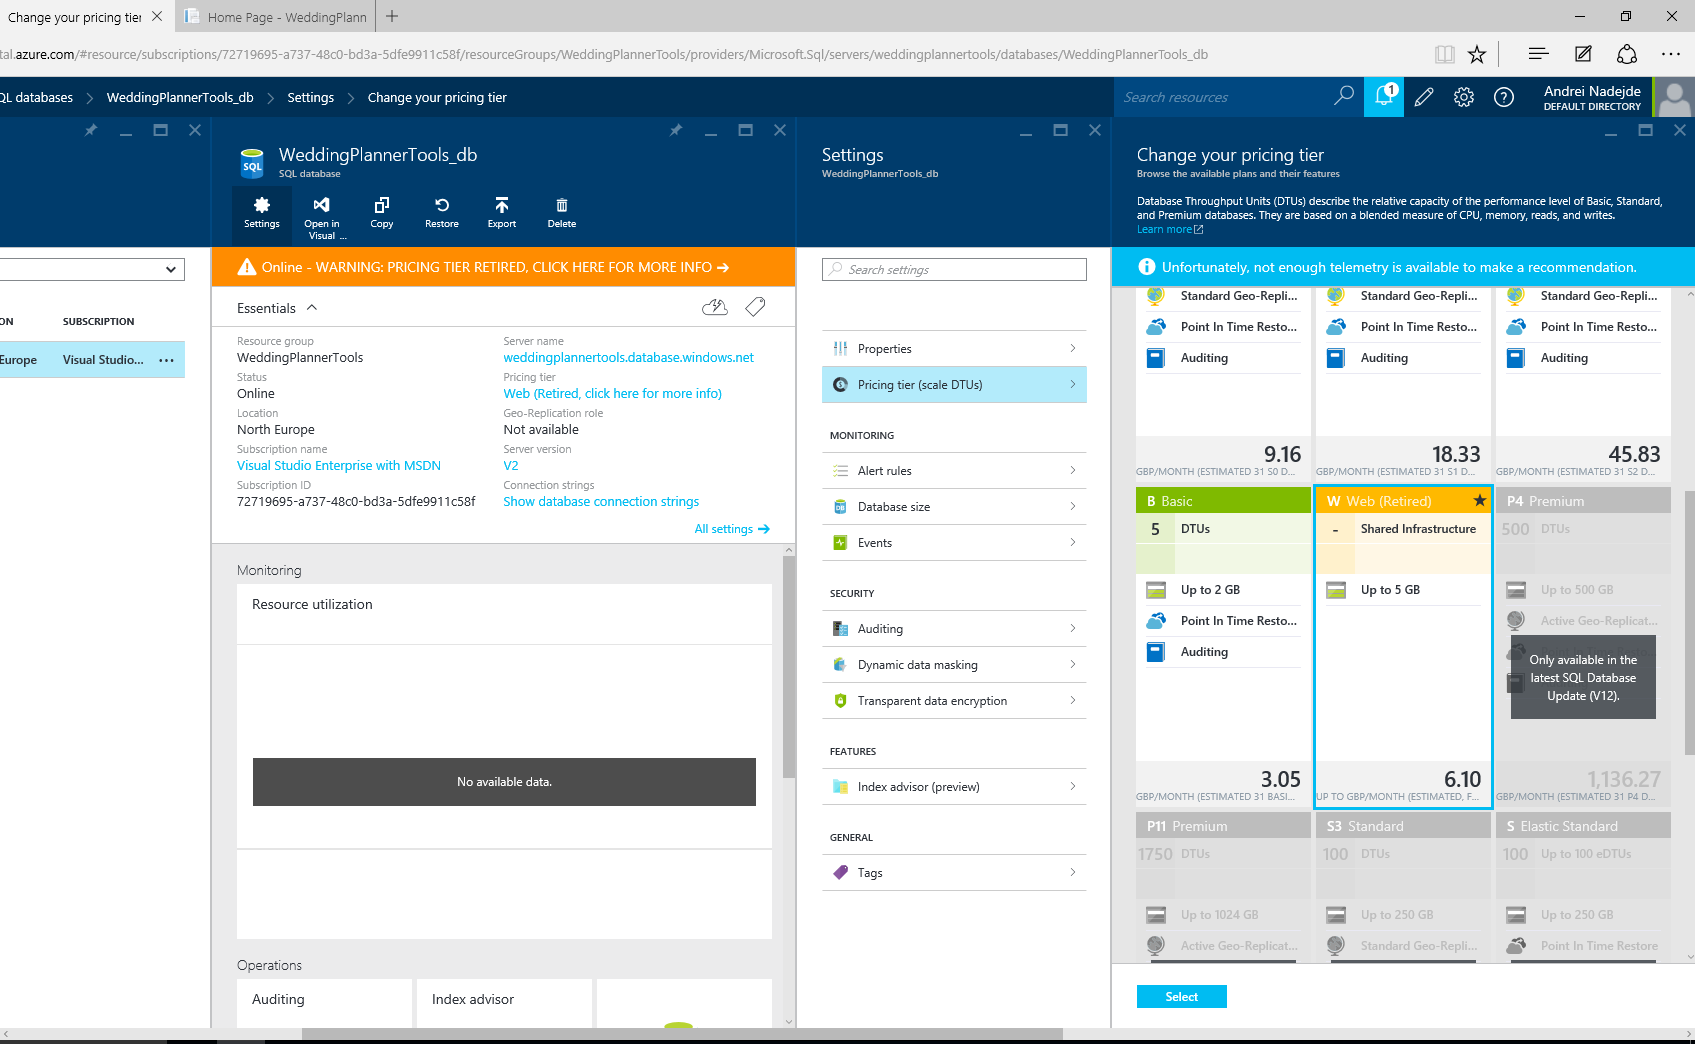
Azure dashboard

It’s running on the free tier. You can have up to 10 free web apps running on azure. Sql server is also provisioned automatically but on a retired tier and you have to change it yourself by going into Settings > Pricing tier. Sql server is not free but for 3£ per month you’re not going to go broke.

Sql Server

Continuous Deployment

You can set-up Visual Studio Online to automatically build and deploy when you check-in your code. There’s a good guide to follow for setting this up here https://msdn.microsoft.com/Library/vs/alm/Build/azure/deploy-aspnet5. I had a small problem at first because the build step was set to do a nuget package restore.

Build failed nuget

This was causing problems because the new project files are not compatible to the old way of using nuget. All nuget packages are restored in the pre build powershell script by invoking dnu restore. I went into the build step and unchecked the restore nuget package option. I also disabled the unit test step as it was throwing an error about a path length (we don’t have unit tests yet anyway). We will set that up when we write some. After that everything went fine.

Build success

You can check remaining free build time in the azure portal. You can also switch to a paid model if you need more time. That will eat up into your azure credit. Strangely enough the time spent by my builds is not showing up in azure so free builds!

VSO build minutes

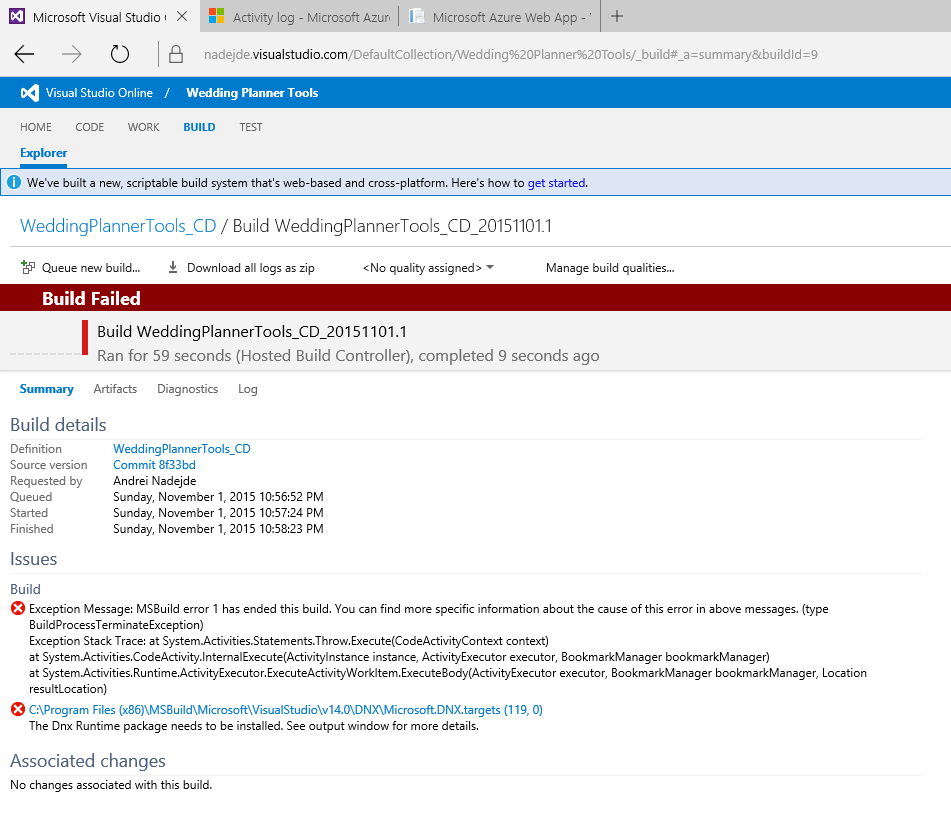
You should be able to set-up the process automatically through azure portal by going into Settings > Continuous Deployment for the web app. Choose the source as Visual Studio Online. Choose the Team Project you want to connect to, the repository and the branch. I’ve set mine to build off the master branch. Azure will then set everything up for you. Each time you check-in into the selected branch you will see a build and deployment triggered. However it seems that build agent used by Visual Studio Online is not set-up for dnx (hence the manual set-up). I’m sure this will get fixed at some point in the future.

Missing DNX

Links
https://msdn.microsoft.com/Library/vs/alm/Build/azure/deploy-aspnet5
First Post
ASP.NET 5
MVC 6
Entity Framework 7

Wedding Planner Tools Web App – part 1

Hello and welcome to he start of the project! As I was saying in my hello world post I will be bogging about my experience in building a web app with ASP.NET 5, MVC 6 and Entity Framework 7.

Lets get to it then.

Source Control

Fist thing I decided to do was set-up my source control. I’m going all-in with Azure on this project so I’ll be using Visual Studio Online for my source control needs. It’s free for up to five users and also comes with nice tools for tracking your work and CI on top of the actual source control bit. You also get 4 hours of free build time per month in the free version (not much but enough to whet your appetite).

Once arrived on the home page I ignored all the fluff and jumped right to it. There’s a New button under Recent projects & teams. Visual Studio Online support Git so I chose that for version control. I tend to like distributed over centralize when it comes to my source control but you can go for TFS if you think centralized might benefit you more.

Create New Team Project

Next step is to link Visual Studio 2015 to the Visual Studio Online Team Project. Go into Team > Team Explorer. This will bring up the Team Explorer panel:

Team Explorer Pannel

Just click Connect here. Then go to Servers > Add. Type in the path to Visual Studio Online in the Server box and click OK. Select the project from the list of projects available on Visual Studio Online.

Add Team Foundation Server

The new Team Project now appears in the Team Explorer panel under the TFS server under the Connect tab (clicking the little plug icon brings this up).

Team Project

Double clicking the projects name takes you to the Home tab. You can clone the repository from Visual Studio Online here by pressing Clone this repository. Choose a folder and press Clone.

First Project

Pressing New under Solutions section brings up the New Project window. Go to Installed > Templates > Visual C# > Web and create ASP.NET Web Application project type.

New Solution

I used the Web Application from ASP.NET 5 Preview Templates. I kept the authentication as Individual User Accounts as I plan to use this later. I also checked Host in the cloud as I will be deploying to azure.

Web Application

I configured a new Web App and Database in Azure clicked OK and off we go. At this point Visual Studio will configure the project and restore all the required packages. There are a lot of changes in ASP.NET 5. It’s all very modern. You should read all about it here: http://docs.asp.net/en/latest/conceptual-overview/index.html. Hit F5 and rejoice. It works:

Hello World

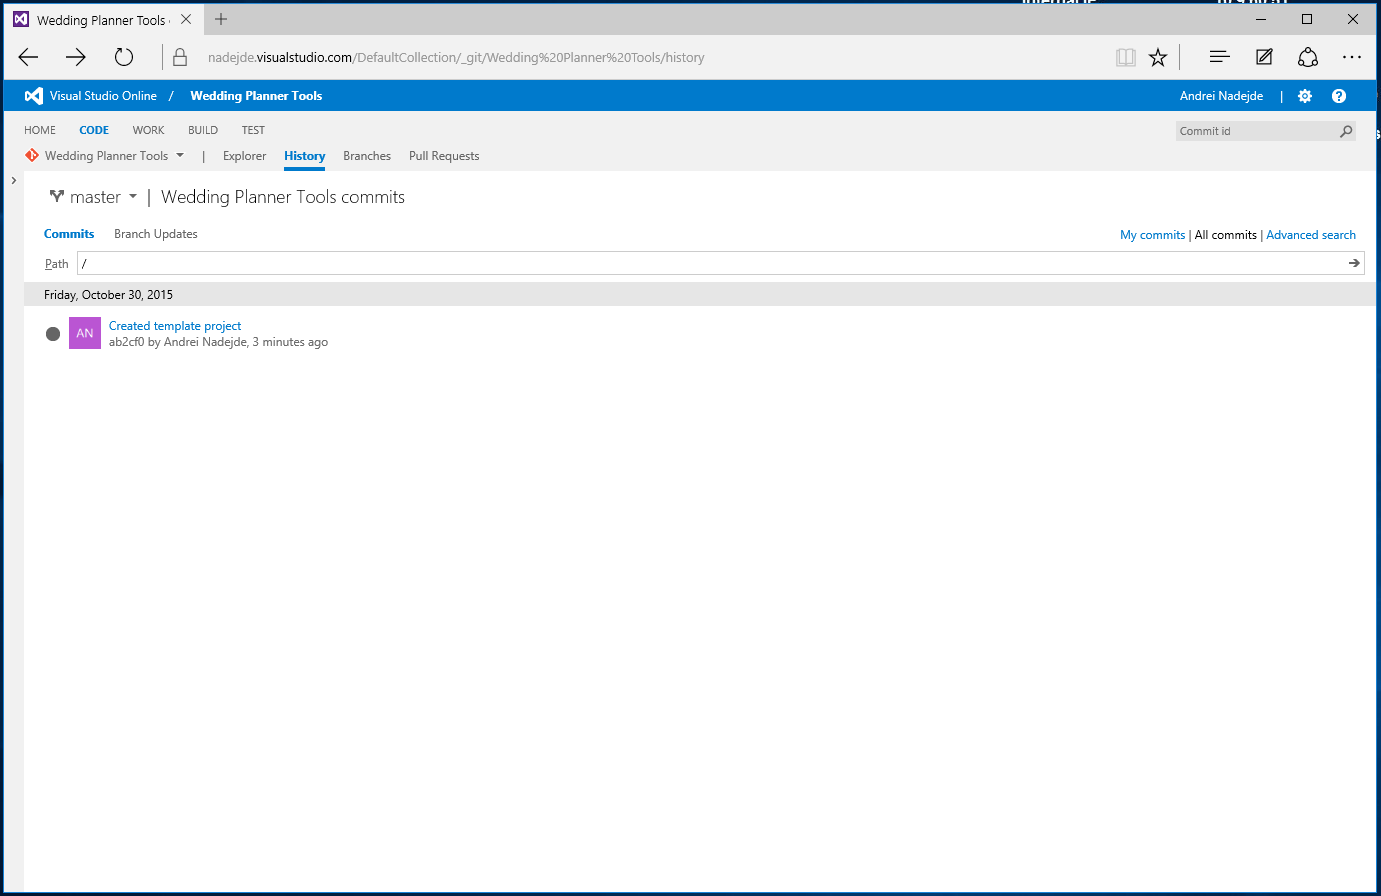
Last step is to go back to the Team Explorer panel into the Changes tab. I used Created template project as a commit message and then commit and push to the remote repository (Visual Studio Online). You can either Commit and Push in one go or just Commit and push later from the Sync tab. Visual Studio Online now shows the last commit and you can look at source history.

Source control history

Links:
ASP.NET 5
MVC 6
Entity Framework 7
Visual Studio Online
Azure

Hello World!

I’ve decided to start working on a new project with ASP.NET 5, MVC 6 and Entity Framework 7. I’ve always wanted to also keep a development blog so I’m going to use this project as a starting point. I don’t have a plan in place or any hard deadlines. I will be working in my spare time when I have the chance.

If you plan on following along you should know a little bit about .net, c# and asp.net.

Enjoy and see you soon!

Links:
ASP.NET 5
MVC 6
Entity Framework 7